Showing posts with label vegetarian. Show all posts

Wednesday, October 28, 2015

Refried Beans

Confession time: this is not my first go at refried beans.  I've tried them before and they were runny, watery, and just, well, gross.

But this time?  This time they were really good.  Like, good enough that I ate them leftover.  Yeah, that's kind of a big deal.

 
They are simply seasoned - just taco seasoning and a little S&P.  Plus, they are very low maintenance too.  They cook for a few hours, but you don't have to do much besides blend them up at the end.  And, depending on how chunky or smooth you like yours, might not take much time at all. 

We had these on tostada shells for dinner - it was a great meal!

Refried Beans
Makes 8 servings


Ingredients:
16 oz dried Pinto beans, rinsed and picked through (remove any 'ugly' beans or stones that may have snuck inside the bag)
1 medium onion, coarsely chopped
2 garlic cloves, smashed
2 tbsp taco seasoning
Water or veggie/chicken/beef stock
1 tbsp butter
Salt and pepper to taste

Directions:
1.  Place the beans, taco seasoning, onions, garlic and enough water (or stock) to cover the beans by about 1 inch and bring to a boil.  Lower the heat to a simmer, cover and cook until the beans are tender - between 2 and 3 hours.  Open the lid to stir every 30 minutes or so and add more liquid if it gets low.

 
2.  Remove the beans from the heat and get to mashing/pureeing!  I used my immersion blender, but a potato masher and some elbow grease would work great too.

 
3.  Once the beans have reached the consistency you like, taste and season with salt and pepper (and more taco seasoning if desired), turn the burner back up to medium and add in the butter.  Stir the beans to melt the butter and warm back up.  Serve and enjoy!


 Happy Eating!
 
~ Sara :)

Tuesday, October 27, 2015

Pierogis

Move over, Mrs. T.!!
 
I grew up on frozen pierogis - they're one of the few items that I will still occasionally buy frozen and cook.  But, that may all change now that I've made them from scratch.  These are one of those meals that you never make because you think they'll take too long....but in reality, they don't.
 
Another plus?  You can make a whole lot of them and freeze them.  Just one batch makes a ton.  If you were to double it - well, then you'd be set for many meals!


I tried two different fillings for these - the classic mashed potato and cheddar and some with my fermented sauerkraut.  I was pleasantly surprised with the sauerkraut.  I may have even liked those a bit more than the potato.
 
Sure, these take time, but the nice thing is that you can do a lot of the work ahead of time.  The dough and filling and even the pierogis can be made in advance and cooked when needed.


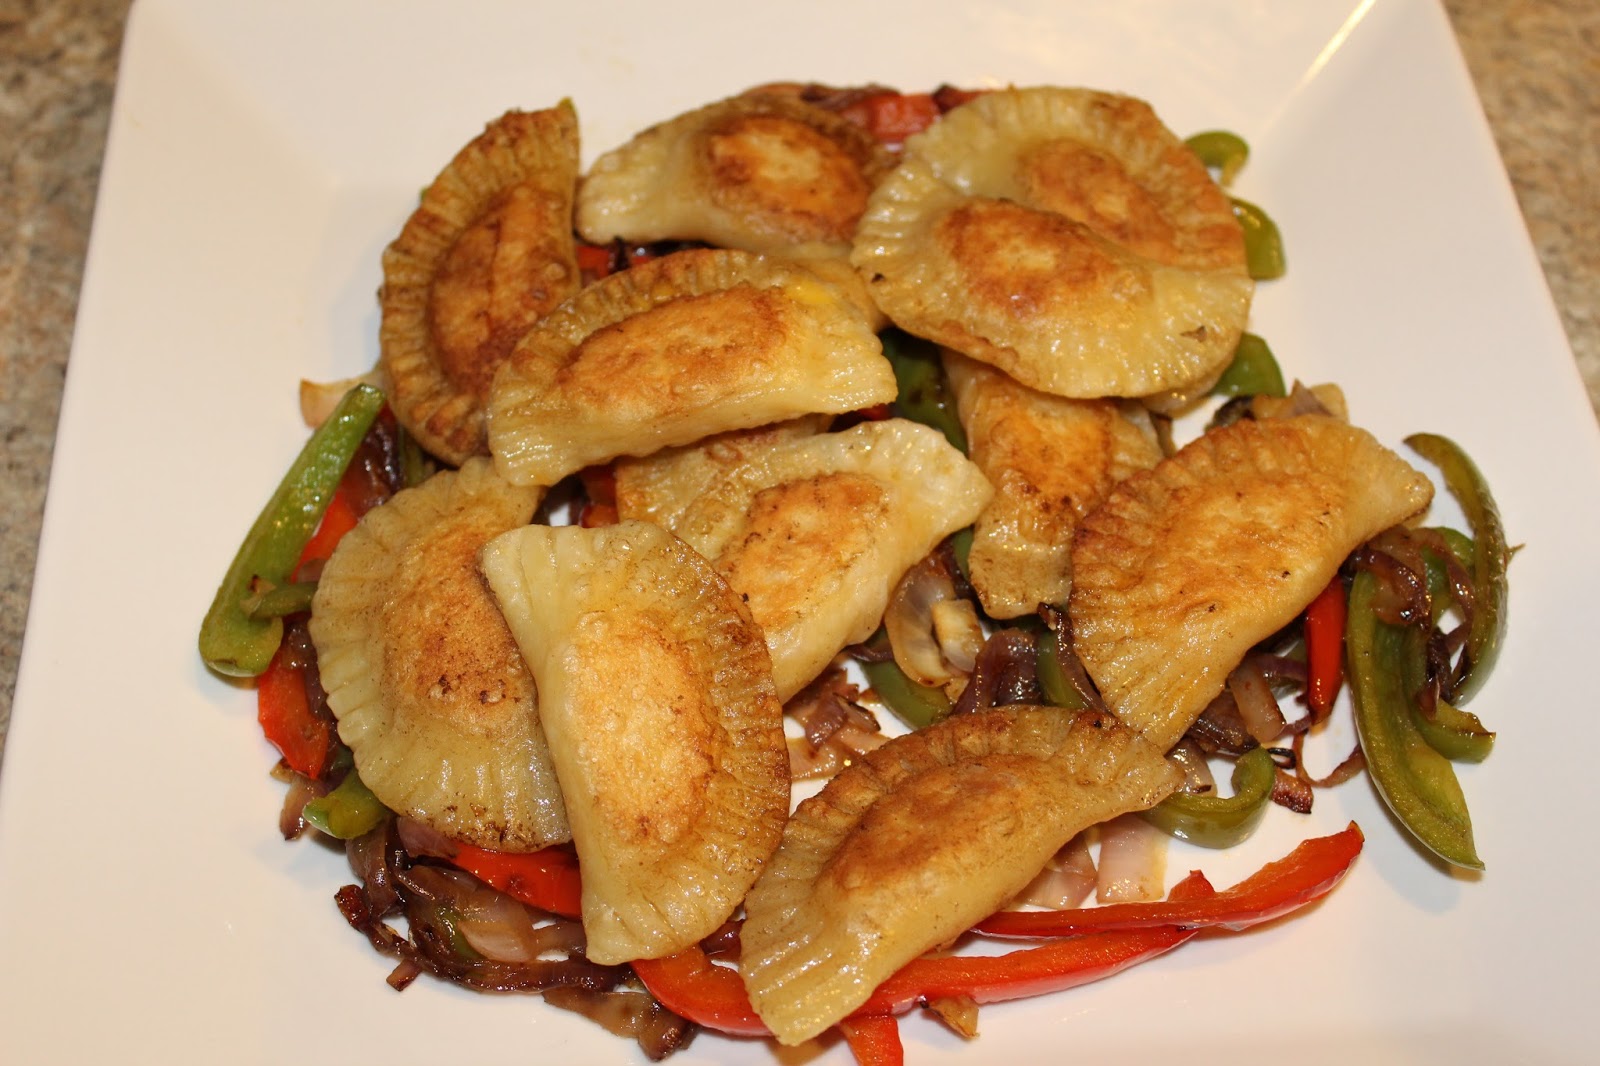
These are traditionally served with sour cream and/or applesauce.  I like to serve mine with sautéed peppers, onions and garlic.
 
 
Homemade Pierogis
Makes approx. 4 dozen


Ingredients:
2 cups all-purpose flour
1/2 tsp salt
1 egg, beaten
1/2 cup sour cream
1/4 cup unsalted butter, room temperature
1 cup prepared mashed potatoes combined with 1 cup shredded cheese
Or
1 cup sauerkraut, well drained
2 tbsp olive oil
1 medium onion, sliced thin
1 bell pepper, cut into strips
2 garlic cloves, minced
2 tbsp butter

Directions:

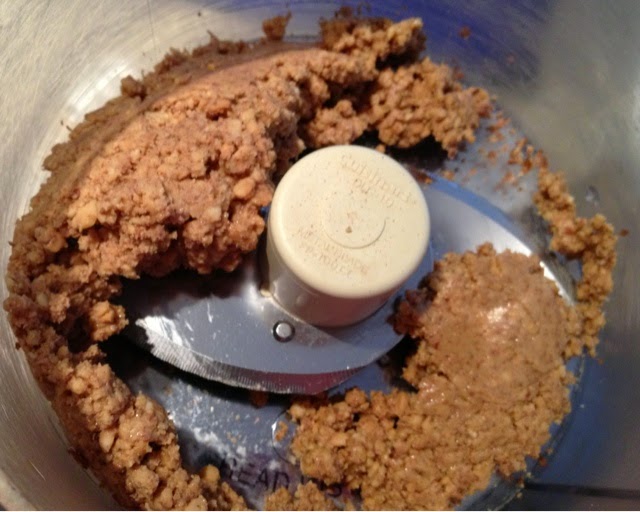
1.  For the Dough: In a large bowl, whisk the flour and salt together.  Add in the egg, sour cream and room temperature butter until the dough forms a slightly sticky ball.  Use your fingertips and knead the dough until it becomes less sticky, but is still moist (no additional flour should be necessary).  Wrap the dough in plastic wrap and refrigerate for at least 30 minutes, but up to 24 hours.


2.  Once the dough has been chilled, remove it from the fridge and cut it in half.  On a well floured surface, roll the dough out to approximately 1/8" thick.  Using a 2"-3" cutter (I used a 2.75" biscuit cutter), cut the dough into circles.  Repeat until all dough (or at least most) has been used.


3.  Fill each dough circle with 1-2 tsp of mashed potato or sauerkraut filling.  Fold the dough over and, using a fork, seal the edges of each pierogi.  Now, these can be cooked immediately, refrigerated for 24 hours or frozen for 2 months.


4.  To prepare:  Heat 2 tbsp of olive oil in a large skillet.  Sauté the peppers and onions until nice and golden, adding in the garlic for the last 2 minutes of sautéing.  While the peppers and onions are sautéing, bring a large pot of salted water to boil.  Boil the pierogis in batches until they float to the top of the water.  Remove, place them on a paper towel to drain and repeat until all pierogis have been boiled.
 

5.  Remove the peppers, onions, and garlic from the pan and place on a serving plate.  Melt 2 tbsp of butter in the pan and nestle the pierogis in the pan.  Cook on each side until golden brown, approximately 3-5 minutes per side.  Serve the pierogis atop the peppers and onions.  Enjoy!


Happy Eating!
 
~ Sara :)

Saturday, September 19, 2015

Fermented Sauerkraut

 You know what one of the most easiest things in the whole wide world to make is? 

Sauerkraut!
 
 
Really, if I would have known just how simple this is, I would have started making it years ago.  And, let's not forget all the amazing probiotics fermented foods fill your body with.  If you're not familiar with fermented foods, take some time to research them.  There are so many health benefits to them and they're delicious! 

Fermented Sauerkraut


Ingredients:
1 head of cabbage, cored and sliced, reserving one full leaf
1 tbsp unrefined sea salt

Directions:

1.  Place shredded cabbage in a large glass bowl and sprinkle with the salt.  Gently toss the cabbage, coating it with the salt.

 
2.  Let the cabbage sit for an hour and then, using clean hands, gently massage and push down the cabbage, encouraging the cabbage to release juices.  Do this until the brine rises above the level of the cabbage.

 
3.  Place the cabbage in a glass container, pushing down the cabbage to ensure the brine rises over the level of cabbage.  Fold reserved cabbage leaf in half or quarters and place on top of the cabbage, pushing it down to encourage more brine to rise.  Close container and place in a cool, dark place and allow to ferment for at least 7 days, but really, for as long as you please.  Once it has a flavor you enjoy, remove the top cabbage leaf and place in the refrigerator.  Enjoy!


A few things about fermenting sauerkraut:
  •  As with any ferment, be sure and 'burp' your jar/container at least every other day.  It's important to allow any gases to escape so that you don't end up with a briny mess all over the place.  I like to place a paper towel or cloth under my jars, just in case any liquid seeps out (and it has!). 
  • The top piece of cabbage will most likely begin to discolor and fade.  That's okay!  It's totally normal.  However, if you see any mold (which is almost always green/white fuzz), discard the top cabbage leaf immediately.  If it is only on the top leaf then your sauerkraut is most likely safe.  But, if you find any mold on your sauerkraut, you're probably best off to discard the whole jar :( 
  • Taste your sauerkraut as you go.  Some people like their kraut to ferment for 30 days or more.  Others only like a 7 day ferment.  Everyone has different taste preferences. 
  •  Experiment and have fun!  Sauerkraut doesn't have to be made from just cabbage - throw in some other veggies and/or spices.  Here are some suggestions: minced garlic, carrots, basil, dill, ginger, turmeric, beets, onions, oregano, thyme, cayenne, fennel....possibilities are endless! 
  • How you consume your delicious kraut also has endless possibilities.  There's the classic Reuben and of course Kielbasa and Sauerkraut (both were a favorite of mine back in my meat eating days!).  It makes a great topper for burgers and hot dogs and is great just on its own.  My favorite way is cooked inside an ooey gooey grilled cheese! 

Do I have you convinced at how easy and delicious homemade sauerkraut is!?  I'm having a great time experimenting with fermentation and can't wait to share more recipes with you as I go.
 
Happy Eating!!
 
~ Sara

Thursday, February 19, 2015

Enchilada Sauce

Mmmm.....we love Mexican food here in the Hayes house!  Enchiladas are one of our absolute favorites.  I really wanted to make some, but since we're doing our Processed Free February, that meant I needed to make the sauce from scratch.  This sauce was great!  Much better than anything you can get in a can.  It does take some time from start to finish, but doesn't require a lot of attention.  Sauté....simmer....blend....voila!

Don't forget to whip up a batch of tortillas for those enchiladas too!

Enchilada Sauce
Makes approximately 2 cups


Ingredients:
2-4 dried chilis (cayenne, ancho, poblano, etc.) depending on your desired heat
1 medium onion, diced
3 garlic cloves, minced
1 tbsp olive oil
1 lb tomatoes, seeded and diced
1 tsp cumin
1 tsp chili powder
1 cup water
1 cup vegetable broth
1/2 tsp salt
1/4 tsp black pepper

Directions:
1.  Remove the stem and seeds from the peppers by carefully cutting them open vertically and scraping out the ribs and seeds.  Cut them into one inch chunks.  Heat a Dutch oven or large pot over medium heat.  Add the chilis and gently toast over dry heat until they begin to turn brown, about 5-10 minutes.  Add in the olive oil and onions and sauté until the onions begin to turn translucent.  Add in the garlic, tomatoes, chili powder and cumin and sauté for an additional 3-5 minutes.

2.  Add the salt, pepper, water and vegetable stock to the pot.  Bring to a simmer, lower the heat and allow to simmer for about 60 minutes, stirring occasionally. 

3.  Using an immersion blender, or working in batches with a food processor or blender, puree the sauce to desired thickness.  You can make it as smooth or as chunky as you'd like.  Once pureed, taste and add more seasoning if needed.  You're ready for some homemade enchiladas!  Enjoy!

Enchiladas

Enchiladas, although time consuming, are one of our favorite meals.  And, it's one of the few things I will actually eat leftover....if there are any left over!  You can put anything you'd like inside these.  Generally, I keep these vegetarian, but sometimes I make some with shredded chicken for Jason.  You could also add shredded beef, ground beef, pork, etc.  These are an ultimate comfort food.

Enchiladas
Makes 4 servings

Ingredients:
1 bell pepper, diced
1 small onion, diced
1 cup brown rice, cooked
1 cup cooked black beans
1 tsp cumin
1/2 tsp salt
1/4 tsp black pepper
10 tortillas
1-2 cups enchilada sauce
2 cups cheese (I like cheddar or Monterey Jack)

Directions:
1.  Preheat the oven to 350°.  Put everything except the tortillas, enchilada sauce and cheese in a medium bowl and combine.*  Coat the bottom of a large casserole dish with 1/4-1/2 cup enchilada sauce.  Begin forming the enchiladas by placing a couple large spoonfuls of the filling into the center of a tortilla.  Roll it up and place it in the prepared dish, seam side down.


2.  Once all of the enchiladas are made, cover them with additional sauce (use however much or little you like) and top with cheese.


3.  Cover with foil and bake for 20 minutes.  Remove foil and continue to bake until cheese is melted and sauce is bubbly, about 10 minutes.  Remove from the oven, serve and enjoy!
 

*If you like your veggies a little softer, sauté them in a tsp of olive oil for 5-10 minutes before adding them to the rice and beans.

Tuesday, February 17, 2015

Black Bean and Quinoa Burgers


Even though I'm a vegetarian doesn't mean I don't love a good burger!  I've never been a huge fan of frozen vegetarian "meat" substances.  They're full of so many things I can't even pronounce!  I've tried a few different variations of veggie burgers before, but this one may be *the* one.  Not to mention it's chocked full of protein.  Can't beat that!
 
Black Bean and Quinoa Burgers
Makes 4 patties
 

Ingredients:
1/4 cup uncooked quinoa
2 cups black beans
1 egg
1/2 cup bread crumbs
1/4 cup bell pepper, minced
1/4 cup onion, minced
3/4 tsp garlic powder
1/2 tsp seasoned salt
1/4 tsp black pepper
1 tbsp olive oil

Directions:
1.  Cook the quinoa in 1/2 cup of water as directed on the package.  While the quinoa is cooking, mash the black beans and egg in a large bowl with a fork or potato masher.
 

2.  Once beans are mashed and combined with the egg, add in the additional ingredients.  Mix well and score the mixture into four equal parts; make into patties.

3.  Heat the olive oil in a pan over medium-high heat.  Cook patties for 3-5 minutes per side.  Or, wrap individually in Saran Wrap and freeze.  Enjoy!
 

Monday, January 26, 2015

Homemade Nut Butter

I have been making my own nut butters for about six months now.  I'll never go back to buying it at the store!  It is seriously so easy and quick.  All you need is a food processor and 5 minutes.  For real.

 "Peanut. Hazelnut. Cashew nut. Macadamia nut...Pistachio nut. Red pistachio nut. Natural, all natural white pistachio nut."
(name that movie!)

The best part?  You can use any nut that you like.  Your favorite nuts are almonds?  Throw some in a food processor!  One of my favorites is walnut butter.  So creamy, smooth and delicious.  A nice to change to regular ol' peanut butter.  Not that there's anything wrong with peanut butter!

I've experimented with different kinds of peanuts and, surprisingly, the type I've found to work (and taste) the best are roasted, salted, skin on Spanish peanuts.  When I first tried them, I was skeptical because of them having the skin, but they work so well and the outcome is delicious!  Two of my favorite ways to enjoy nut butter is on English Muffins or Whole Grain Sandwich Bread.

Homemade Nut Butter

Walnut and Peanut Butter.  Deeeelicious!
Ingredients:
Nuts


That's it.

Directions:
1.  Place the nuts in a food processor - I usually do about 8 ounces at a time, you don't want a crowded processor.  Turn the processor on and let it run for 2-5 minutes until you have a smooth, buttery consistency.  You may need to stop and scrape down the sides once, but that's it!  How easy is that!?


You can also spice up your butter with anything you like: cinnamon and chocolate are two of my favorite add-ins :)

Monday, December 8, 2014

Sautéed Brussels Sprouts with Cranberries, Walnuts and Gorgonzola

I adore Brussels Sprouts.  No, really, I do!  When I was younger, my mom would boil them and the only way I'd eat them was with tons of butter.  Kinda sorta defeats the purpose, I suppose.  But now I make them all the time, most often roasted.  I made these Brussels sprouts last year for Thanksgiving and they were so good that I made them again for Christmas.  Then....I forgot about them.  Until this week.  These are soooo good.  The kind of thing you don't want to end.  Ever.

Sautéed Brussels Sprouts with Cranberries, Walnuts and Gorgonzola
Serves 2-4

Ingredients:
1 lb Brussels sprouts, trimmed and quartered
1/2 cup walnuts, roughly chopped
2/3 cup fresh cranberries
1/2 tbsp balsamic vinegar
3/4 tbsp maple syrup
2 tsp evoo
1/3 cup Gorgonzola, crumbled
Kosher salt

Directions:
1.  Heat a large skillet over medium high heat.  Add the walnuts and toast until they become fragrant and start to brown.  Do not step away!  They will go from toasty to burnt in seconds.  Transfer to a small bowl and set aside.

2.  Put the pan back on the heat and add the evoo.  Once the oil is hot, add in the Brussels sprouts.  Sauté until they're beginning to brown and starting to get tender; about 8-10 minutes.  Add in cranberries and continue to sauté.

3.  Once cranberries begin to pop and Brussels have reached desired tenderness, add in reserved walnuts and sprinkle with Kosher salt and mix well.
 
4.  Add in the maple syrup and vinegar.  Mix well, sprinkle with Gorgonzola and serve.  Enjoy!!
 

Tuesday, March 25, 2014

Mushroom Tetrazzini

There are a few dishes that I really miss since becoming a vegetarian.  Turkey Tetrazzini is one of them.  So, I decided to make a vegetarian version with just mushrooms.  Just as creamy and delicious as I remember.  Even without the turkey!

Mushroom Tetrazzini
6 servings

Ingredients:
1/4 cup unsalted butter
1/4 cup flour
1/2 tsp salt
1/2 tsp pepper
1 tbsp (2-3 cloves) garlic, minced
1 cup low fat milk
1 cup low sodium vegetable broth
8 oz mushrooms, chopped
8 oz whole wheat pasta, cooked and drained

Directions:
1.  Preheat oven to 350.  Melt butter in a large pot over medium-high heat.  Add in flour, salt, pepper and garlic and whisk until no lumps remain.  Pour in broth and milk and let cook until it begins to bubble and thicken, whisking occasionally.
 
2.  Once sauce has thickened, add in mushrooms and pasta.  Mix well ensuring everything is coated in the sauce.
 
 
3.  Pour tetrazzini into a 2 quart baking dish and top with Parmesan.  Bake until bubbly, 20-30 minutes.  Place dish under the broiler for 1-2 minutes to brown the top.  Let cool for 10 minutes, serve and enjoy!